Showing posts with label I_fix_it. Show all posts

Tuesday, 11 November 2014

Rebuilding old Power pack, LiPo-edition (Hitachi B-2 for DRC-10K)

Old cordless drill with a bew batterty pack
Drill with the first LiPo -pack I made some months ago.
Apparently my fathers venerable old Hitachi DRC-10K cordless drill fails to die, so once again there are need for battery refreshment build. Earlier days (see earlier post ) I did use NiMh cells, but the times have moved on.

When I checked the prices of those tabbed Sub-C cells from net, I noticed that can get a decent capacity LiPo power pack at the same price. So i decided to give these new packs a go, thus I did the first conversion some months ago.

Realistically it's only 1200 mAh if even that.
During this time I've been listening feedback from my father about this idea. And since he's happy with drill performance and lighter weight, I'm now making second LiPo battery pack, and finally taking couple pictures for this blog as well.  :-)

LiPo vs NiMh
So much smaller and lighter.
One of the biggest advantage for using LiPo batteries in this kind of project is the wide availability of ready build packs. These packs are used on various radio controlled systems, like cars, planes and quad copters. On first version I  purchased brand battery and balancing charger from RC hobby shop.

For this second build, I decided to cut some corners (and cost). This LiPo battery shown on these pictures is a cheap Chinese knock-off, with obviously incorrect markings printed on. Also the size is somewhat smaller so I'd expect the real capacity being lower as well. Chinese sellers are well known on their inflated markings, but I'd expect this battery to serve well at this application.

Ready to close zip ties, balance port at left.
While comparing LiPo to NiMh, the size difference is quite noticeable.  One needs six NiMH's cells for 7.2 volts while there are only 2 cells at this LiPo pack I used as an replacement. And even thought those old cells had more power in them (over 2000mAh) while on optimal charge, the NiMh cells high self-discharging meant those batteries were rarely well charged the moment of need.

Charging with Turingy balancing charger.
In the end this conversion was not a big job. Electrically it's just desoldering and removing the old cells and connecting the new ones to existing battery pack contacts. The biggest part of work went onto B-2 -pack case modification. These rechargeable lithium batteries need to be balanced while charging, so there's need to have their balance port (white 3-pin connector shown) routed out of the pack.

At the time of this writing I have no idea how long these batteries will last, but I'd expect them to stay good at least few years. If the new charger behaves, there should be no problems for some time. 

Friday, 25 January 2013

Diytao #8, vlog: Fixing with Sugru

Hi,

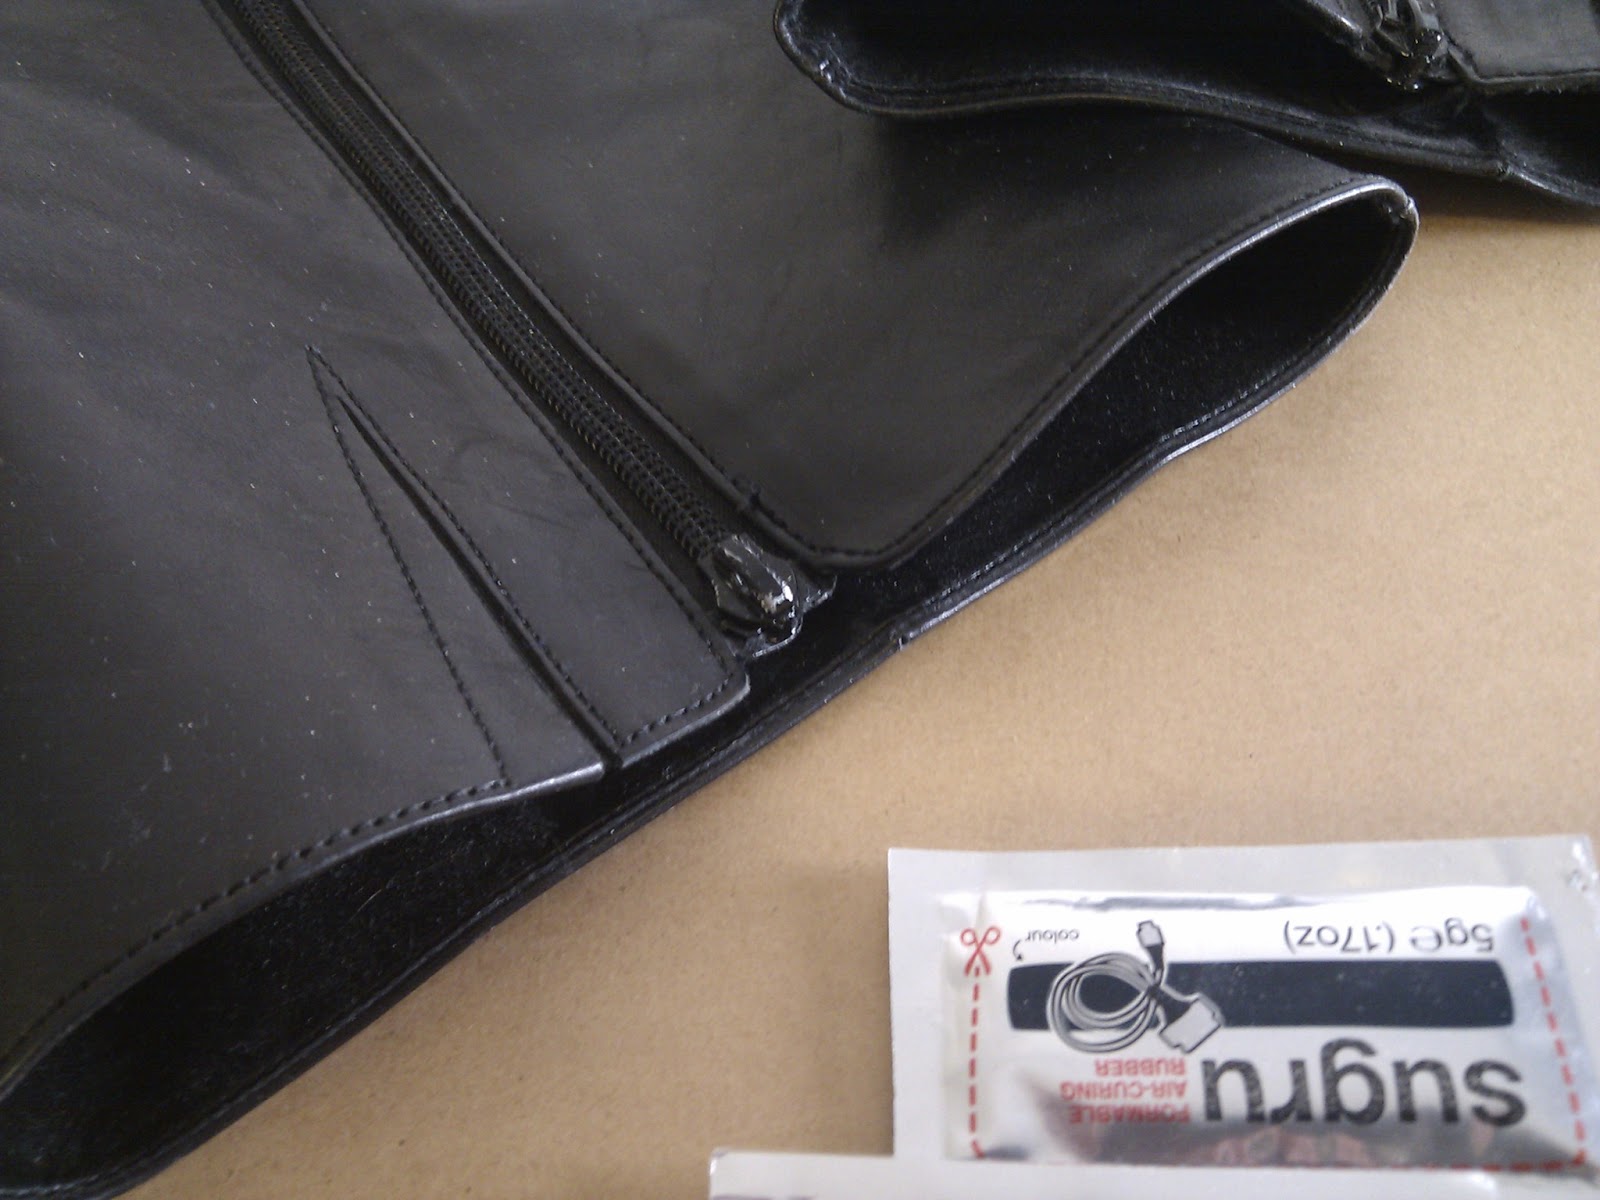
After a long while I made a new video of fixing things. This time it's about using Sugru and paper clip to repair the broken zipper of the winter shoe.
Onward with video..

Video #8

As a side note, I tried to make a new intro video. But I have to admit I'm not sure if it's a good or not. Feedback is well appreciated. And, yes, no money was harmed on shooting. ;-)

Sunday, 6 January 2013

Review: Cheap and broken.. Multimeter test leads

Often, it's been said that cheap products can't be good. Well, sometimes they do work and fulfil the need, sometimes the product simply don't cut it. A world of wisdom amongst electronic hobbyists is that one should never connect/use anything that's been purchased from various 'chinaimports' without at least opening and examining it first.

And here's a good basic example of total lack of manufacturer QC, even though the multimeter leads should be a simple item. It' still too difficult to make them right at the first take. Behold, the 2.5$ multimeter test leads:
Always open and check before using, their QC just ain't.

For the picture I have opened both ends of the red wire. As far as parts go, these test leads are well within the expected quality for 2.5$ price. Nothing fancy, alligator clips feel ok and the banana plugs are half decent.

Unfortunately the wire connections leave a lot to comment. The alligator clip side is almost ok, I'd would like to see some solder added, since the bare metals tend to oxidise and lose contact soon. Banana plugs are worse, though. The red cable had essentially no contact at all, the screw did not touch the copper wire at all, essentially it was just gripping the insulator.

Secondary problem is the open end of the screw, as seen on black banana jack. This leads high risk of getting electrocuted due direct contact to metallic parts.Note though, that I would not ever recommend to use this kind cheap and thin wires to any high voltage measurements, but just in case someone accidentally does it..


To fix these, I'll need to re-make all connections and insulate the banana plugs so the screws can't be touched accidently. All in all, this re.work is not a biggie for someone knowing electronics, but in the end there may well be a lot people who don't have the necessary talent and skill to repair these shoddy products.

PS: Just in case you'll got irresistible urge to get one of these, here's the link to these test leads . I did try to leave critical feedback concerning the QC and safety of the product, but it was not accepted. Ah well, can't please em all the time, my positive remarks of other goodies have been accepted though, so it can't be my English...

Sunday, 20 May 2012

Rebuilding old Power pack (Hitachi B-2 for DRC-10K)

Hitachi DRC-10K... Slightly used, like 30 years
My father has this three decades old Hitachi DRC-10K cordless drill and against all odds it has proven to be nearly indestructible. Unfortunately rechargeable NiCd batteries tend to wear out and thus need replacement sooner or later. Even thought 3rd party power packs are still available those tend to cost around 40 Euros (50USD) before delivery, taxes etc.. And quite frankly you can purchase all new cordless drill with price like that.

B-2 type power pack (once opened)
So.. Alternative is to replace the battery elements inside power pack. It's actually quite easy to do and saves easily over 30€ when compared of purchasing new pack. Of course it'll take some time and effort, but for someone willing to DIY and values recycling, it's the right way to go. 

Six new NiMh cells soldered together
First part of project is opening the battery pack and checking what type and size the batteries are. Opening the pack depends a lot of the pack itself. Hitachi's original B-2 battery is sealed with some kind of glue, so you'll need to use some real force and mechanical tools. I had opened this particular pack earlier (10+ years ago?) and by the looks of it, I must have used tools like hacksaw, sharp knife and screwdrivers. In the end the tools don't matter so much, as long as you don't break the cells inside pack or hurt yourself.

Heatshrink protecting joints
After opening the pack one has to check what size the rechargeable cells are. At B-2, there are six sub-C elements (size approx. 40*20mm). For this purpose it's convenient to use cells with metal tabs on them. Easiest way to get cheap replacement cells is to search net sellers from sites like Ebay. Unfortunately I can't really recommend any of those stores, since they tend sell whatever is available, thus there is no real guarantee of the quality or capacity of the cells.

After opening the power pack you'll need to unsolder the power wires from old batteries and start preparing the new ones.  First duplicate the layout of the batteries and solder metal tabs together. As these differ for each pack I can't give more explicit guide here. Just be sure to check polarities and cnnect the batteries just like old ones were and it will be ok.

Twist, test and solder power connector
With B-2 power pack it made sense to build two sets with 3 batteries each and bend them so that they fit into existing enclosure. I decided to use soldering which is ok, as long as on don't burn the batteries with overheat. I also decided to cover connections with heat shrink tube.

Next is soldering the power connector wires to batteries (remember polarity) and stuffing these renewed innards inside existing power pack enclosure. I decided to use some hot glue to keep power pack safely closed.

Rebuild powerpack alongside modified Hitachi charger
For testing I did charge the battery pack with modified hitachi charger. The original charger (30 years old) was designed for using with NiCD only. Since NiCD are harmful to environment I have lately been using NiMh batteries instead. With NiMh batteries there was need for new type smart charger (with Delta-V detection). As a bonus this new charger is also faster and can handle both types of batteries.

Old NiCd batteries I've used years ago
After a couple hour recharge, the power pack was inserted to drill and tested to be on working condition. I have not done any power tests so I have no idea how good these new batteries are, but I'll expect to hear comments as soon as my father needs the drill next time for some tinkering project he has.

And that leaves the last part, trash disposal. Making sure that those old used NiCd batteries I had used years ago at previous Rebuild will be properly handled and processed as an special garbage. I have no idea how harmful NiCd batteries really are, but at least in EU area those are under strict control, so one has to be careful how to dispose them.


Meta:

I know... I have not been making these updates as often I ought to, for keeping this blog interesting. So sorry, not having any good excuses either, no mystic NDA projects, no family issues etcetc..




Wednesday, 22 February 2012

Sugru: So, what to do with it?

Some time ago I decided that I'll need to look and test this relatively new material called Sugru. In simplified terms, it's yet another kind of moldable plastic. I would say it is kinda like self curing silicone, freshly out from the bag it's soft to handle and sticks well to various materials. During some hours at the room temperate, it will dry and Sugru become rubbery like material. There are no resellers at this part of the world so I ordered my first 12 minipacks directly from manufacturer.

Packing is functional, and in a way these aluminium bags do look kinda stylishly futuristic and flashy. Outermost was the normal brown envelope (with address label), inside it a single bigger aluminium bag with ziplock. Inside this bag were twelve 5gram packages of Sugru (assorted colours) and short instruction and inspiration booklet for helping one to get started.

I really like their slogan "hacking things better", it tells a lot about the attitude this startup company works. Their website has plenty of user posted pictures and stories how this new material has helped these people. 

For myself, I have not yet decided what to build/hack with this first, but I allready have some ideas so I'm quite sure I'll be able to use all these packs while the material is fresh. Even though the Surgru is well packed to those individually sealed aluminium foil packs, it will stay fresh only about six months. So, expect to see something more interesting coming with Sugru on it.

Tuesday, 20 December 2011

A fix, I hope

Two of these.. 

I have finally decided to start making new parts in purpose of fixing the on/off issue of this printer. With Bowden type extruder, there is always a risk of the bowden-tube been too stretchy or getting lose.

At Emaker Huxley, this 3mm PTFE tube is attached with an Pneumatic connector, which is nice and quick way, and does usually work reliably enough.

Unfortunately that didn't seems to be case with my machine. I am not sure if it's due variance at parts or have I done something wrong while building the machine.
with four nuts+bolts and two cable ties

Earlier I have tried some alternative fixings, like glue and heatshrirk tube. Unfortunately the PTFE (best known with brand name Teflon) tube is extremely slippery so making solid fix is kinda hard.

I do hope this one works,.. There is room for improvements, in case someone is interested. All the design files are available at http://www.thingiverse.com/thing:14854


Thursday, 8 December 2011

First fix, video #4

This video is recorded at 30th of November. Like I then mentioned at Repairs and reshoot -post, I managed to mess with the X-drive belt while printing the oversized object. I fixed belt at the same night, but have not edited the video until today. While I'm writing this the video is rendering and I'll link it here as soon as it is available at Youtube.


All in all, the fix was easy and took me about 15 minutes. I might have been able to do it a bit faster if the camera has not been in way at a time. So far the problem has not repeated itself. I didn't mention it on the video, but I also added a dash of glue to the belt end. I do hope it'll help it to keep well put.

I have also renamed posts which have video files embedded. I hope it'll make finding the clips easier.

Saturday, 3 December 2011

A small object to make..

As mentioned earlier I got this small replacement part to design and print. It is an fixture to hold window blinds adjustment rod neatly. This definitely ain't complex part and I know that these are sold at stores. But as an example of a home made thingy.. It's not bad at all..

My part at Sketchup
It took me some time to get the 3d shape in a form I'd like since I'm no expert on 3d cad work. Also I needed to fix the model couple times as the exported stl -file was declared to be non-printable. For printing I used clear PLA so I had to paint the part. Painting itself was not difficult, a friend of mine has nice set of miniature paints and they seem to stick nicely to this kind of plastic.

15 * 20 mm part, ready to use
During the design process I noticed that by altering the shape somewhat I could make this part much more solid, but I decided to keep changes as small as possible. If it holds, good. If it breaks, well, then it's time to make some modifications to design.

Addendum: I forgot to add the cad files.. Both Sketchup design and stl-export are freely available at:
http://www.thingiverse.com/thing:14169

Wednesday, 30 November 2011

Repairs and reshoot

After yesterday's printing I noticed that while hitting the top frame, the x-carrier had not only lost it's z-axis calibration but also the x-direction belt has become loose from one end. I must assume  my original assembly was a bit weak and the extra hassle at the end of printing the angel figure was just the final straw.

To reattach the belt at the carrier part, I'll need to remove the printing hot end and open up the carrier assembly. It should not be a biggie and I think I might even try to video it with some explanatory documentation while fixing the issue. Also the print bed level + head distance calibration will be necessary to do before I can continue printing.

I also got a small project to do with printer. A certain small plastic fixture is broken and there's need for a replacement part. It would be my first real 3d designed item that's for real use.

Otoh, I do know that my intro-video is a bit late. Perhaps I'll get it done too? Someday?